Trying to put watermarks on your images but can’t get a good result with regular edition apps?
Your problem is over! With Watermark Logo – Protect Files, you can easily add logos on your photos with just a few clicks and still increase the quality of the logo’s image with our color correction tools.
Don’t waste your time putting logos on your images one by one! Watermark Logo – Protect Files allows you to add a watermark on any number of images you want. You can also configure the transparency, location, proportion and size of your logo to get the best result you need.
• Adding Images: You can add one or more images to add the logo.
• Adding a Logo: Select the logo you want (PNG image) to put on all your photos.
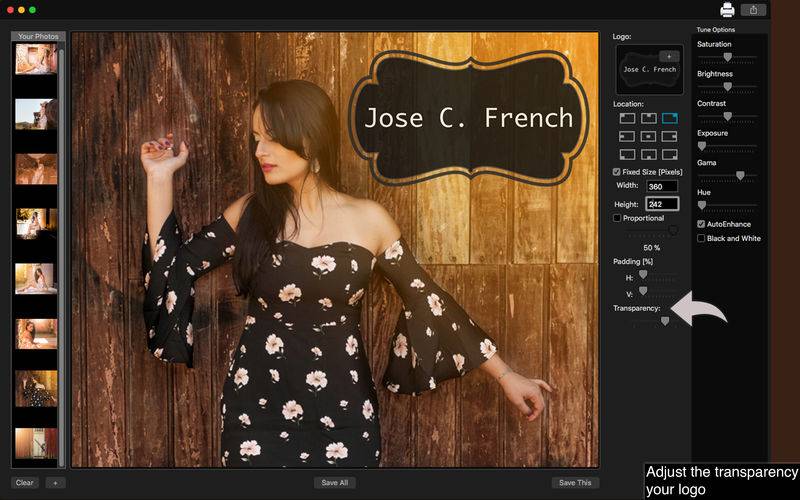
• Logo configurations: Allows you to edit the logo settings like Location, Width, Height, Padding and Transparency.
• Color Correction: Enhance the quality of your logo using the tools Auto-Enhance, Black and White effect, Saturation, Brightness, Contrast, Exposure, Gama and Hue.
• Share on social media: With just a simple click, you can share your photo directly in social network.
• Print images: You can print your images with just one click.
• Export Images: You can save your images with the formats PNG, JPEG, JPEG2000, TIFF and BMP.
••••••••••••••••••••••••••••••••••••••••••••••••••••••••••••
Enjoy our amazing features:
••••••••••••••••••••••••••••••••••••••••••••••••••••••••••••
• Add logos.
• Auto-Enhance.
• Black and White.
• Color Correction.
• Configure Logo settings.
• Easy to use interface.
• Export the pictures to anywhere you want.
• Share on social media.
• Easily print your photo.
• Save images with PNG, JPEG, JPEG2000, TIFF or BMP formats.
••••••••••••••••••••••••••••••••••••••••••••••••••••••••••••
How to use:
••••••••••••••••••••••••••••••••••••••••••••••••••••••••••••
1. Click the [ + ] button on Your Photos area to add one or more images to put a logo.
2. To add a Logo, click the [ + ] button on Logo area.
3. In Location, choose the location you want to put the logo on your images.
4. To use the original size of your logo image or fix a new size, active the Fixed Size option and set the Width and Height.
5. To use a proportional size, active the option Proportional and move the bar to the proportion you want.
6. You can manually set the location use the Padding’s H and V bars.
7. To change the transparency of the logo, slide the Transparency bar.
8. Adjust the settings like you want (Auto-Enhance, Black and White, Contrast, Brightness, and more) in Tune Options area.
9. Use the [ Defaults ] button if you wanna use the default settings of your logo.
10. Click [ Save This ] button to save the current image or [ Save All ], choosing between PNG, JPEG, JPEG2000, TIFF and BMP formats.
11. To print your image, you can click on the Printer button.
12. To post your photo on social media, you can click on the Share button and choose the social network you wanna post.